This post will walk you through deploying Synology’s Cloud Station Backup on macOS.
To get this setup I used a text editor for scripts, DB Browser for SQLite to review the SQLite databases, and Packages to create my configuration package. I used VMware Fusion for testing and Munki for deployment.
- Create a new Shared Folder to use as your Cloud Station Backup destination
Give a user account read/write access to this folder. I recommend creating a specific user for this with a long random password. These credentials will be deployed to connect Cloud Station Backup to your Synology.
2. Install Cloud Station Server on your Synology
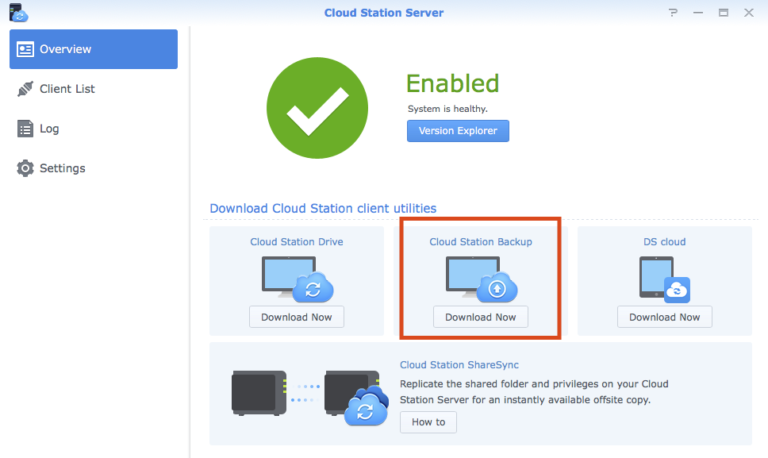
3. Open the Cloud Station Server app
4. Download the Cloud Station Backup software
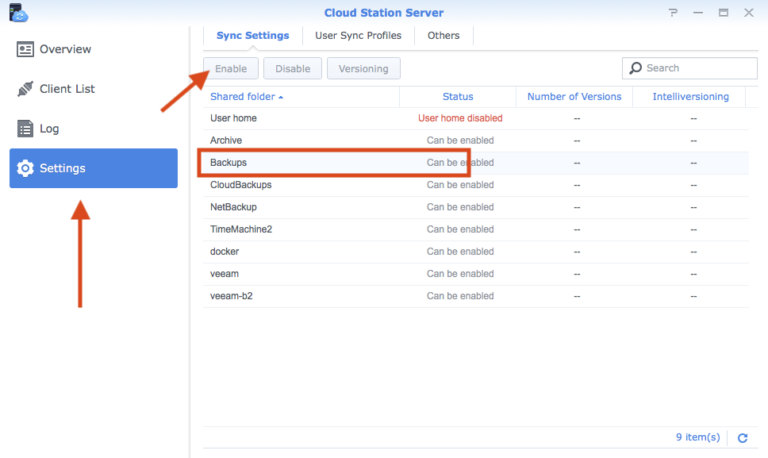
5. Click Settings
6. Select the share you just created and click Enable
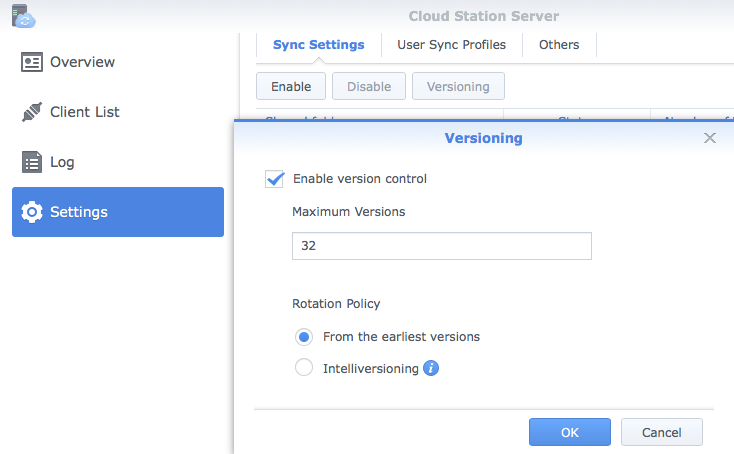
7. Configure versioning how you’d like it and then click OK
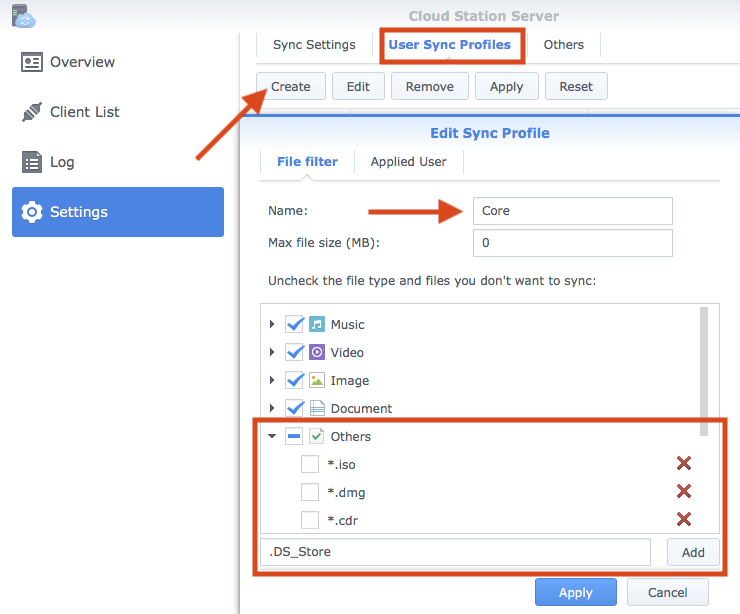
8. Click User Sync Profiles and click Create
9. Give it a name and uncheck any file types that you don’t want to be backed up
10. You can also add file extensions at the bottom like this: *.dmg
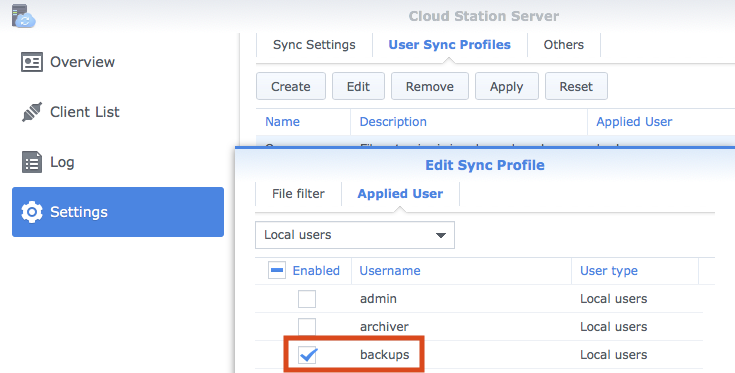
11. Click the Applied User tab, check your backup user, and then click Apply
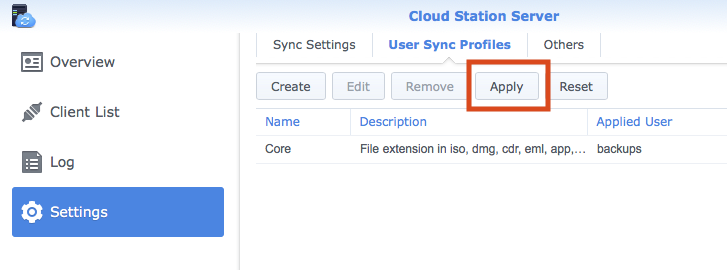
12. Click Apply to save the settings configuration
This should finalize your Cloud Station Server configuration. You can come back and edit any of this if you ever want to make any changes and it will download the new sync profile to the backup client.
13. Install the Cloud Station Backup software on a test machine or VM
We’re going to install this on a test machine first, so that we can grab two configuration files. Once installed it’ll open a setup wizard.
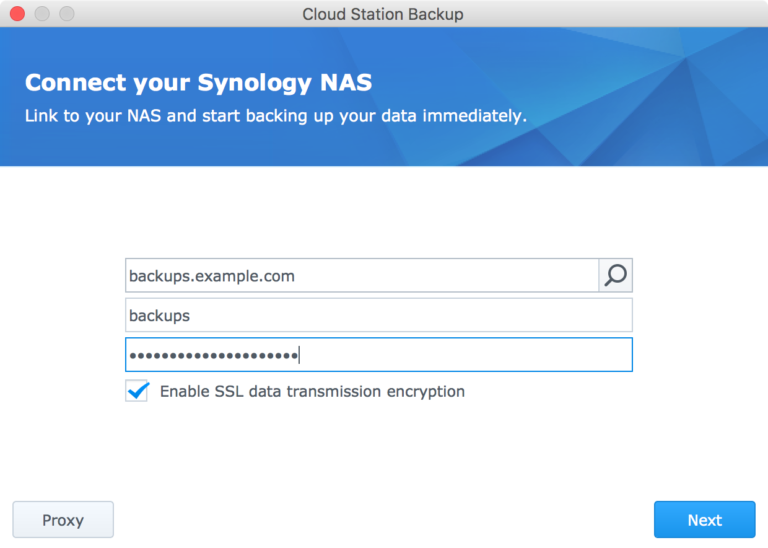
14. Walk through the setup wizard and configure the Cloud Station Backup
In this step you’ll want to enter the connection details using the backup user from step one.
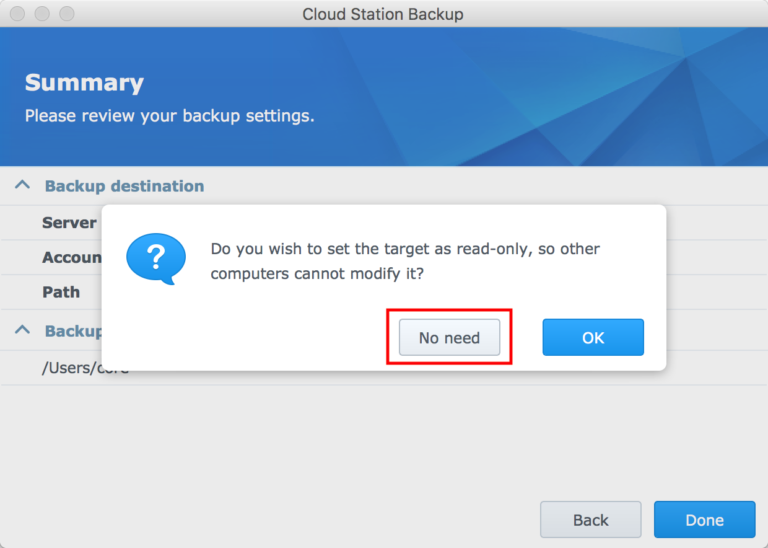
Walk through the steps until you get to the Summary screen.
On the Summary click Done and then click No need.
Once you’re done with the setup wizard the client will start backing up. Go ahead and exit the app (right click the menu item -> exit.)
15. Open the invisible ~/.CloudStationBackup folder
16. Copy out ~/.CloudStationBackup/data/db/sys.sqlite file
This file contains most of our configuration. There are five values we’ll need to update per install so that we don’t have all of our machines backing up on top of each other. Here’s the breakdown of the sys.sqlite file.
The first table in this database is the connection_table. This table contains all of the information to connect to the Synology. The only non-obvious field is the session field. This is some form of your password. When deploying the software, the only value in this table that we’ll need to update on install is the computer_name field. You can use this sqlite3 command to update the value:
sqlite3 ~/.CloudStationBackup/data/db/sys.sqlite "update connection_table set computer_name = 'COMPUTER NAME' where id=1;"
Anytime you see COMPUTER NAME or USERNAME in the SQLite commands, then you will need to fill in the user’s computer name and/or username. I’ve got a script below that automatically gets the computer name and will run these SQLite commands.
Next we’ve got the server_view_table. As far as I can tell this table just contains some info on the backup share that we’ve connected to. We don’t need to update anything here.
Next is the session_table. This table will contain all of the top level folders you’re backing up. I’m not exactly sure how the program decides when to add a new session or add item[s] to the blacklist.filter file. For my use case I’m just backing up my users home folder, so I’ve just got one session. If you’re backing up multiple top level folders (like external hard drives) I recommend you experiment with this on your test machine and review this sqlite table (this is where DB Browser for SQLite comes in handy.)
The two main fields we’ll update in this table are the remote_path and the sync_folder. The remote_path is the path to the backup on the backup share. The sync_folder is the path to the folder to be backed up.
If you have multiple top level folders then you’ll have multiple session rows. You’ll need to pay attention to the id field.
This command will set the proper remote path, filling in the computer name and username of the end client machine:
sqlite3 ~/.CloudStationBackup/data/db/sys.sqlite "update session_table set remote_path = '/CloudStation/COMPUTER NAME/Users/USERNAME/' where id=1;"
The remote path in this command will need to be tweaked for your setup. For me I’ve got a Backups share with a CloudStation subfolder where my backups reside. Cloud Station Backup assumes Backups as the root for the remote_path so the remote path starts with my subfolder: /CloudStation. Take a look at your sys.sqlite file and verify its remote_path.
This command will set the client’s folder to backup.
sqlite3 ~/.CloudStationBackup/data/db/sys.sqlite "update session_table set sync_folder = '/Users/USERNAME/' where id=1;"
Next is the sqlite_sequence table. I think this just keeps track of how many Synology connections and top level folders you’ve added. We don’t need to touch anything here.
Last is the system_table. This table will have another spot with the clients computer name and the full path to the backup. The last two fields we’ll update here are the computer_name and backup_remote_path field.
You can update these two values with these commands:
sqlite3 ~/.CloudStationBackup/data/db/sys.sqlite "update system_table set value = 'COMPUTER NAME' where key='computer_name';"
and
sqlite3 ~/.CloudStationBackup/data/db/sys.sqlite "update system_table set value = 'Backups/CloudStation/COMPUTER NAME' where key='backup_remote_path';"
As stated before, Backups is my share and CloudStation is the subfold I’m storing my backups in. In the backup_remote_path value Cloud Station Backup doesn’t assume the Backups share, so it must be included. You’ll want to review your sys.sqlite file and update this command accordingly.
17. Copy out ~/.CloudStationBackup/data/session/1/conf/blacklist.filter
If you have multiple top level folders then you should have multiple sessions, and you’ll need to setup your blacklist for each of these sessions. If you’re like me and just backing up home folders, then you’ll only need to edit the session 1 blacklist.
18. Edit the copied blacklist.filter file to add the folders we don’t want to backup
This file is just a plan text file, so open it up with your favorite text editor. This is where we add any folders that we don’t want to backup to the black_dir_prefix list.
The root directory for these folders is the main backup folder selected. So if you’ve selected the users home folder as the backup folder, then that’s the root folder. /Library is ~/Library. Spaces don’t have to be escaped. Here’s an example line that will blacklist the ~/Library and ~/Documents/Microsoft User Data folders:
black_dir_prefix = "/Library", "/Documents/Microsoft User Data"
The only thing that I haven’t figure out with the blacklist is that adding a folder to the blacklist that doesn’t exist on the users machine will cause Cloud Station Backup to uncheck all of the folders and not back anything up. Since I really don’t want to backup users Dropbox or Google Drive folders, but not all users have it, I will need to work out a way to dynamically add folders to the blacklist. Once I get that nailed down I’ll link that here.
For now, here’s what my blacklist.filter file looks like:
[Version]
major = 1
minor = 1

[Common]
black_dir_prefix = "/Downloads", "/Library"
max_length = 0
max_path = 0

[File]
black_ext = "tmp", "temp", "swp", "lnk"
max_size = 0

[Directory]

[EA]
18. Package the configuration files
For my deployment I used Packages to create a separate configuration package to configure Cloud Station Backup after it’s installed. The package itself just deploys my sys.sqlite and blacklist.filter files to /private/tmp. I’ve created a post-install script (called config.sh) for the package that creates the skeleton folder structure for Cloud Station Backup, copies the two files to their proper location, runs the sqlite commands filling in the client machines name and username, fixes the permissions to be the end user, and then launches the Cloud Station Backup program.
You can see my Packages config here: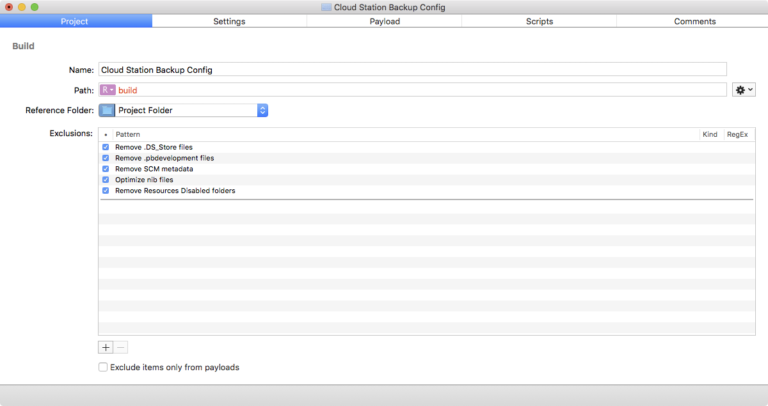
Fill in your project name.
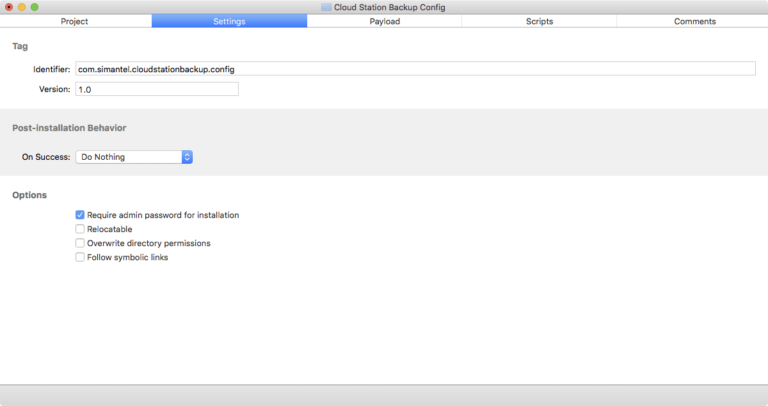
Give your project an identifier. Note this identifier, because you’ll need it for the uninstall script.
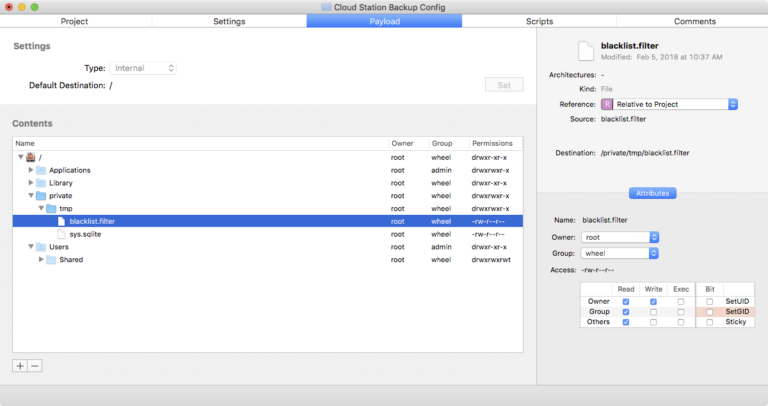
Create the private folder, tmp subfolder, and then drag and drop in your blacklist.filter and sys.sqlite files into the tmp folder.
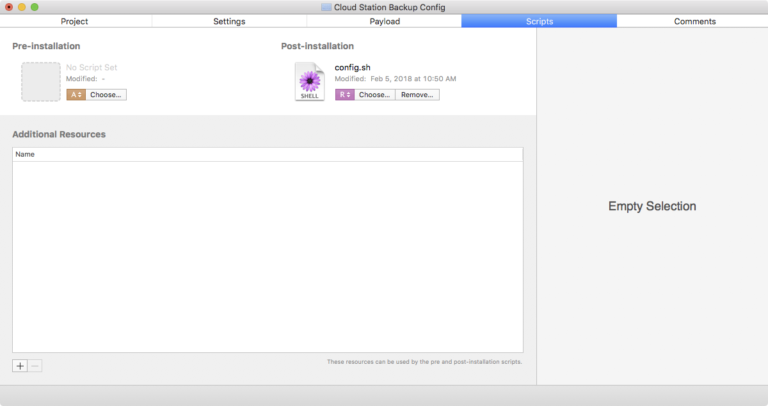
Finally add in this script as a post-install script. Once all of this is done save the project and click Build -> Build (cmd + b) in the menu bar. This will build the package for your deployment.
Before saving this script you’ll want to edit lines 37-39 if you change where the files can be “installed” to (/private/tmp), edit lines 46 and 55 to make sure they match your remote backup paths.
#!/bin/bash

# local computer name
comp="$(/usr/sbin/scutil --get LocalHostName).local"
# path to sqlite3
sq3="/usr/bin/sqlite3"
# get logged in user
theUser=$(/usr/bin/stat -f "%Su" /dev/console)

# fall back to get logged in user if $theUser is root
if [[ $theUser == "root" ]]; then
theUser=$(/usr/bin/defaults read /Library/Preferences/com.apple.loginwindow.plist lastUserName)
fi

# path to the cloudstation backup dir
csb="/Users/$theUser/.CloudStationBackup"
# path to the users LaunchAgents folder
ula="/Users/$theUser/Library/LaunchAgents"

# create cloud station db and config folder to store our config files
/bin/mkdir -p $csb/data/db
/bin/mkdir -p $csb/data/session/1/conf

# create user's LaunchAgent folder if it doesn't exist and fix permissions
if [ ! -d $ula ]; then
/bin/mkdir -p $ula
/usr/sbin/chown -R $theUser $ula
fi

# copy the db files to their proper location
# these files should be acquired after configuring cloud station backup
# on a machine
# the original files can be found at:
# /Users/USER/.CloudStationBackup/data/db/sys.sqlite
# /Users/USER/.CloudStationBackup/data/session/1/conf/blacklist.filter
# after installing and configuring the software manually.
/bin/cp /private/tmp/blacklist.filter $csb/data/session/1/conf/blacklist.filter
/bin/cp /private/tmp/sys.sqlite $csb/data/db/sys.sqlite
/bin/cp /private/tmp/com.synology.CloudStationBackup.plist $ula/com.synology.CloudStationBackup.plist

# sqlite3 commands to config the DB based on the above variables
# sets the computer name
$sq3 $csb/data/db/sys.sqlite "update connection_table set computer_name = '$comp' where id=1;"

# sets the remote path for session 1 to backup to
$sq3 $csb/data/db/sys.sqlite "update session_table set remote_path = '/CloudStation/$comp/Users/$theUser/' where id=1;"

# sets what local folder to backup in session 1
$sq3 $csb/data/db/sys.sqlite "update session_table set sync_folder = '/Users/$theUser/' where id=1;"

# sets the computer name in a different location
$sq3 $csb/data/db/sys.sqlite "update system_table set value = '$comp' where key='computer_name';"

# sets the root backup path
$sq3 $csb/data/db/sys.sqlite "update system_table set value = 'Backups/CloudStation/$comp' where key='backup_remote_path';"

# fix permissions on .CloudStationBackup folder
/usr/sbin/chown -R $theUser $csb
# fix permissions on user's LaunchAgent file
/usr/sbin/chown $theUser $ula/com.synology.CloudStationBackup.plist

# load the cloud Station LaunchAgent (also will launch it for the user)
/bin/launchctl bootstrap gui/$(/usr/bin/id -u $theUser) $ula/com.synology.CloudStationBackup.plist
19. Import the packages into Munki
First I imported the Synology Cloud Station Backup package. The only tweak that I made to the pkginfo was to add the icon.
For the Cloud Station Backup Config package I added an update_for key with the Cloud Station Backup installer item as the string to the packageinfo so the config will install after the Cloud Station Backup package and uninstall when/if the Cloud Station Backup package is uninstalled. I also changed the uninstall method to uninstall_script and added an uninstall_script key with the following string:
#!/bin/bash

# get logged in user
theUser=$(/usr/bin/stat -f "%Su" /dev/console)

# fall back to get logged in user if $theUser is root
if [[ $theUser == "root" ]]; then
theUser=$(/usr/bin/defaults read /Library/Preferences/com.apple.loginwindow.plist lastUserName)
fi

# path to the cloudstation backup dir
csb="/Users/$theUser/.CloudStationBackup"
# path to the users LaunchAgents folder
ula="/Users/$theUser/Library/LaunchAgents"

# quit Cloud Station Backup
/bin/kill $(/bin/cat $csb/ui.pid | /usr/bin/awk -F'"' '{print $2}')
# unload the LaunchAgent
/bin/launchctl bootout gui/$(/usr/bin/id -u $theUser) $ula/com.synology.CloudStationBackup.plist

# delete the Cloud Station Backup folder
/bin/rm -R $csb
# delete the LaunchAgent
/bin/rm $ula/com.synology.CloudStationBackup.plist

# delete the package receipts
/bin/rm /private/var/db/receipts/com.*.cloudstationbackup.config.bom
/bin/rm /private/var/db/receipts/com.*.cloudstationbackup.config.plist
You’ll want to edit the last two lines (27 & 28) with the receipt from your config install (the identifier we gave the package during the Packages setup.)
With all of this done, the final steps are to test everything out, and once everything looks good, deploy!
If you run into problems or have questions feel free to hit me up on the MacAdmins Slack either via DM (@bheinz) or in the #synology channel.
Update 1: After configuring your first backup, do not delete that backup. If it gets deleted, none of the clients using that config will be able to backup. The client machine will complain about not being able to find the backup destination.
Update 2: Changing the certificate under Control Panel -> Security -> Certificate -> Configure -> Cloud Station Server may cause the client to distrust the server. I installed a wild card cert from Let’s Encrypt and set the Cloud Station Server to it and it caused my backups to start failing. Changing back to the Synology certificate resolved this issue.
Update 3: If your certificate gets messed up then client machines will get paused. If this happens I’ve built a script to reset the backup state. In the sys.sqlite DB in the session_table there’s a status field. This indicates what the backup state is.
0 == Off
1 == Backup up-to-date
2 == Backing up
3 == Backup paused
After fixing my cert my backup clients were stuck in state 3, paused. You can read this state with this command:
/usr/bin/sqlite3 /Users/$(/usr/bin/stat -f "%Su" /dev/console)/.CloudStationBackup/data/db/sys.sqlite "select status from session_table where id=1;"
To resolve this and reset the state I wrote a script. You can see the script here.
It shuts Cloud Station Backup down, changes the state to 0, then starts Cloud Station Backup again. I’ve been using this command to run the fix on my machines through ConnectWise Control:
#timeout=120000
/usr/bin/curl https://gist.githubusercontent.com/bryanheinz/07a42ec17d1e0b4c376a946708ac7f22/raw/6715bb740d2be2df3c70db2bd23c4f3865c5407d/csb_status_reset.sh | /bin/bash
Update 4: I’ve created a Watchman Monitoring plugin that can be found here. It reads the history.sqlite file to check when the last file was backed up. If it’s been more than 3 days it will flag it as a warning in Watchman. If it’s been more than 7 days, then Watchman will send an email alert.
The plugin and plist gets installed into /Library/MonitoringClient/Plugins. They should both be owned by root:wheel. The plist permissions should be 644 (rw-r--r--) and the plugin permissions should be 744 (rwxr--r--).